Release automations (AWS, GitLab, n8n)
Release process automation with GitLab and n8n
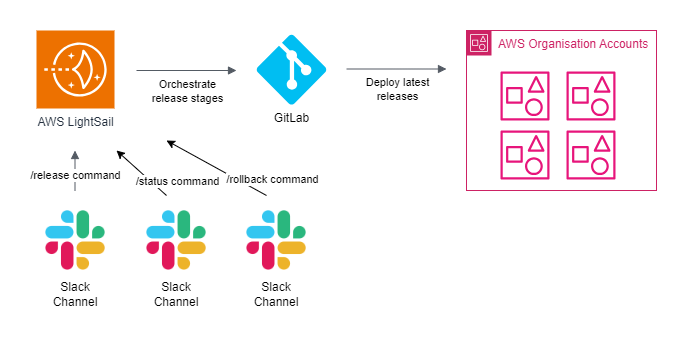
 Automation Process Schema
The idea behind this automation workflow was to replace the manual release process with a streamlined, automated pipeline. This approach eliminates human errors, reduces time spent on repetitive tasks, and ensures consistent results across deployments. Below is a breakdown of the key steps that were automated:
- Gather commits into the release, and deploy to the test environment using GitLab.
- Perform Cypress and Jest tests. Ensure pipeline is green.
- Generate CHANGELOG.md file and update package.json.
- Create new tags and branches.
- Deploy new release to the stage environment and evaluate release KPI: performance testing, metrics etc.
- Deliver updates to various environments.
- Send message about the status to the Slack channel.
AWS compute environment
For cost efficiency and simplicity, we opted for Amazon Lightsail, a user-friendly and budget-conscious solution. Starting at just a few dollars per month, it provides a ready-to-use service for small-to-medium workloads, perfectly suited for hosting n8n.
We utilized AWS SAM and CloudFormation templates to provision the instance programmatically. This ensured consistent infrastructure setup and simplified maintenance. Here's an example template for setting up a Lightsail instance tailored for n8n:
  AWSTemplateFormatVersion: '2010-09-09'
  Transform: AWS::Serverless-2016-10-31
  Description: AWS SAM template to launch an Amazon Lightsail instance with n8n on Ubuntu

  Parameters:
    AvailabilityZone:
      Type: String
      Default: eu-central-1a
      Description: Availability Zone for Lightsail instance
    InstanceName:
      Type: String
      Default: n8n-automation
      Description: Name of the Lightsail instance
    BlueprintId:
      Type: String
      Default: ubuntu_24_04
      Description: Lightsail Blueprint ID (Ubuntu 24.04 LTS)
    InstanceSize:
      Type: String
      Default: small_2_0
      AllowedValues:
        - micro_2_0
        - small_2_0
        - medium_2_0
        - large_2_0
      Description: Instance size for Lightsail
    KeyPairName:
      Type: String
      Default: default
      Description: Name of the EC2 Key Pair for SSH access
    HostedZoneId:
      Type: AWS::Route53::HostedZone::Id
      Description: ID of the existing Route 53 hosted zone
    DomainName:
      Type: String
      Default: n8n.example.com
      Description: Full domain name for n8n (e.g., n8n.example.com)

  Resources:
    LightsailInstance:
      Type: AWS::Lightsail::Instance
      Properties:
        AvailabilityZone: !Ref AvailabilityZone
        InstanceName: !Ref InstanceName
        BlueprintId: !Ref BlueprintId
        BundleId: !Ref InstanceSize
        KeyPairName: !Ref KeyPairName
        Networking:
          Ports:
            - FromPort: 5678
              ToPort: 5678
              Protocol: TCP
        Tags:
          - Key: Name
            Value: !Ref InstanceName

    Route53RecordSet:
      Type: AWS::Route53::RecordSet
      Properties:
        HostedZoneId: !Ref HostedZoneId
        Name: !Ref DomainName
        Type: A
        TTL: 300
        ResourceRecords:
          - !GetAtt LightsailInstance.PublicIpAddress

  Outputs:
    LightsailInstanceIP:
      Description: The public IP address of the Lightsail instance
      Value: !GetAtt LightsailInstance.PublicIpAddress
n8n installation
Once the Lightsail instance was provisioned, the next step was to install and configure n8n. This required setting up a reliable environment to host the automation tool. The installation process includes:
- Installing dependencies such as Node.js.
- Configuring the n8n service as a systemd unit for seamless startup and management.
- Securing the environment with proper directory permissions.
Additionally, the n8n.service file provided here enables easy management of the n8n service, ensuring it runs smoothly and restarts automatically in case of failure.
#!/bin/bash
set -e
sudo -i

# Update and install dependencies
apt-get update -y
apt-get install -y apt-transport-https ca-certificates curl software-properties-common

# Install Node.js and npm
curl -fsSL https://deb.nodesource.com/setup_20.x | bash -
apt-get install -y nodejs

# Install n8n globally via npm
npm install -g n8n

# Create n8n directory
mkdir -p /home/ubuntu/n8n
chown -R ubuntu:ubuntu /home/ubuntu/n8n
[Unit]
Description=n8n workflow automation tool
After=network.target

[Service]
Type=simple
User=ubuntu
Environment="N8N_HOST=n8n.example.com"
Environment="N8N_PORT=5678"
Environment="WEBHOOK_URL=http://n8n.example.com:5678/"
Environment="N8N_SECURE_COOKIE=false"
ExecStart=/usr/bin/n8n
Restart=on-failure
StandardOutput=journal
StandardError=journal

[Install]
WantedBy=multi-user.target
systemctl daemon-reload
systemctl enable n8n
systemctl start n8n
Pre-release maintenance
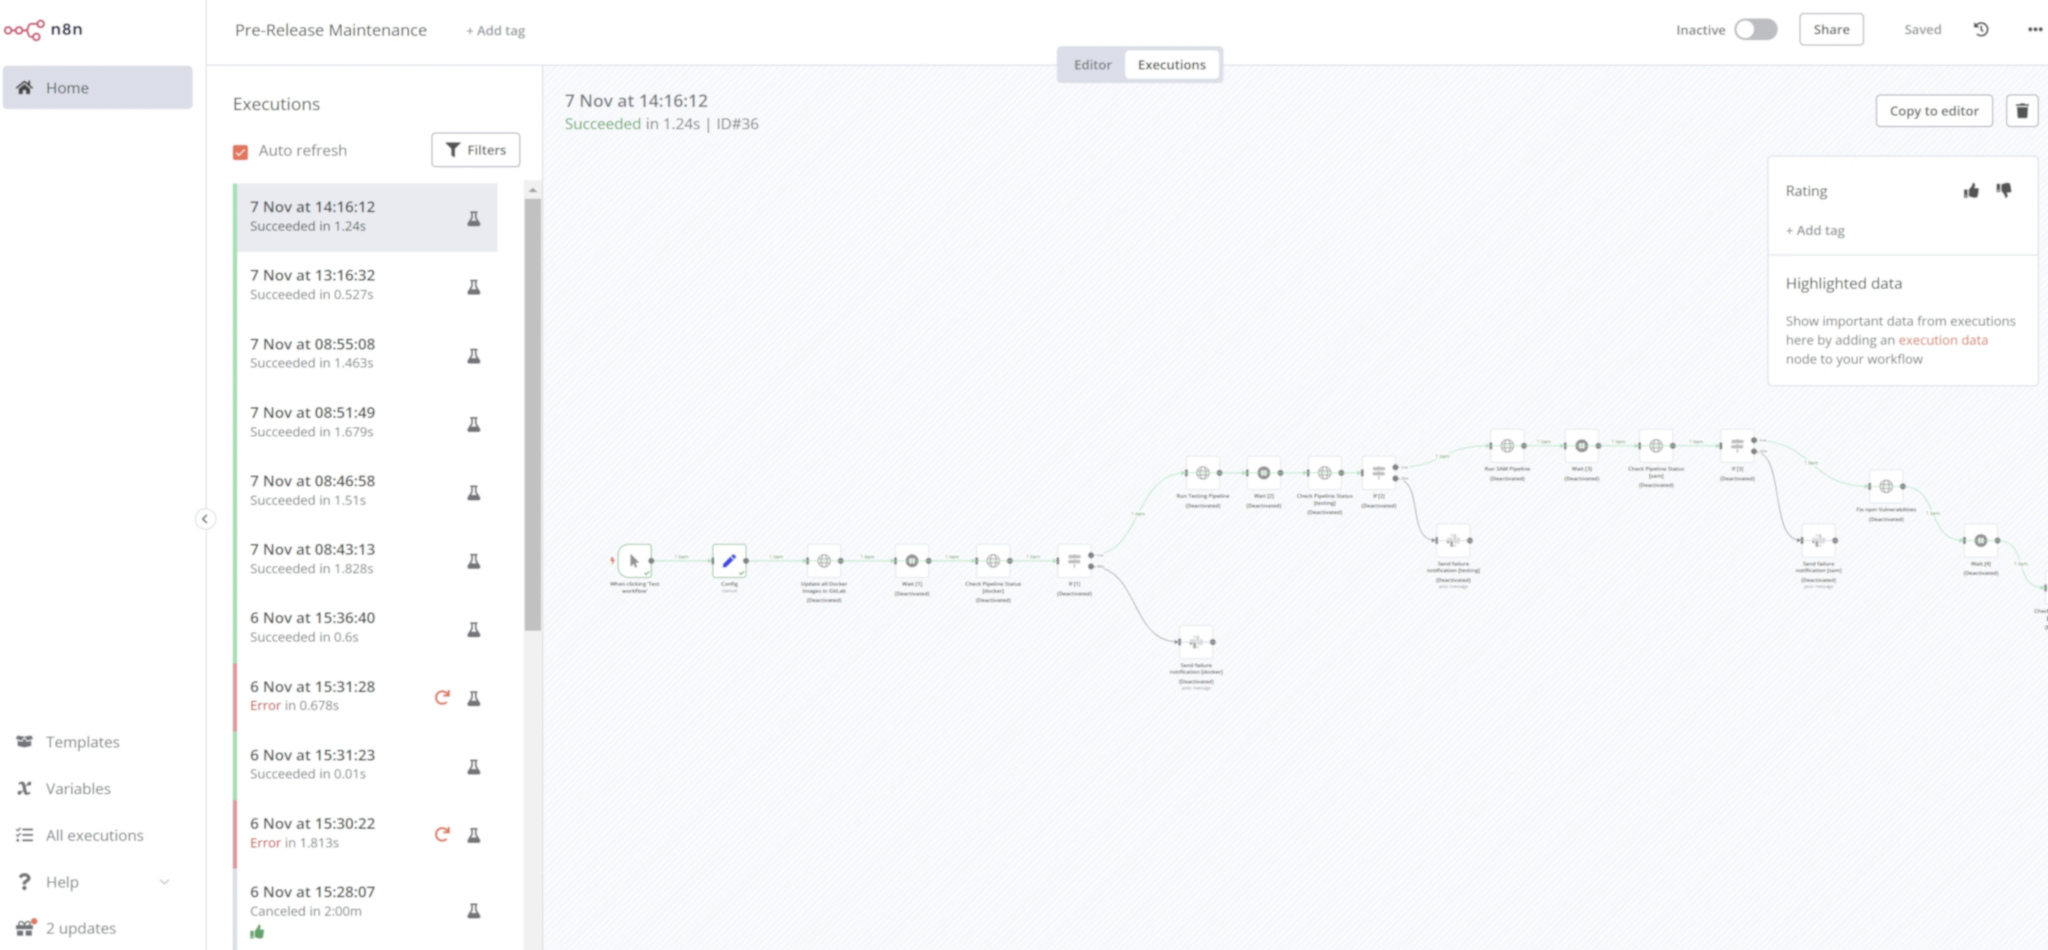
Before starting a new sprint, regular maintenance tasks such as container updates and package upgrades are necessary to ensure a stable and secure environment. These tasks were automated using a dedicated pre-release workflow, further reducing manual intervention.
 Pre-release n8n schema
Release automation in n8n
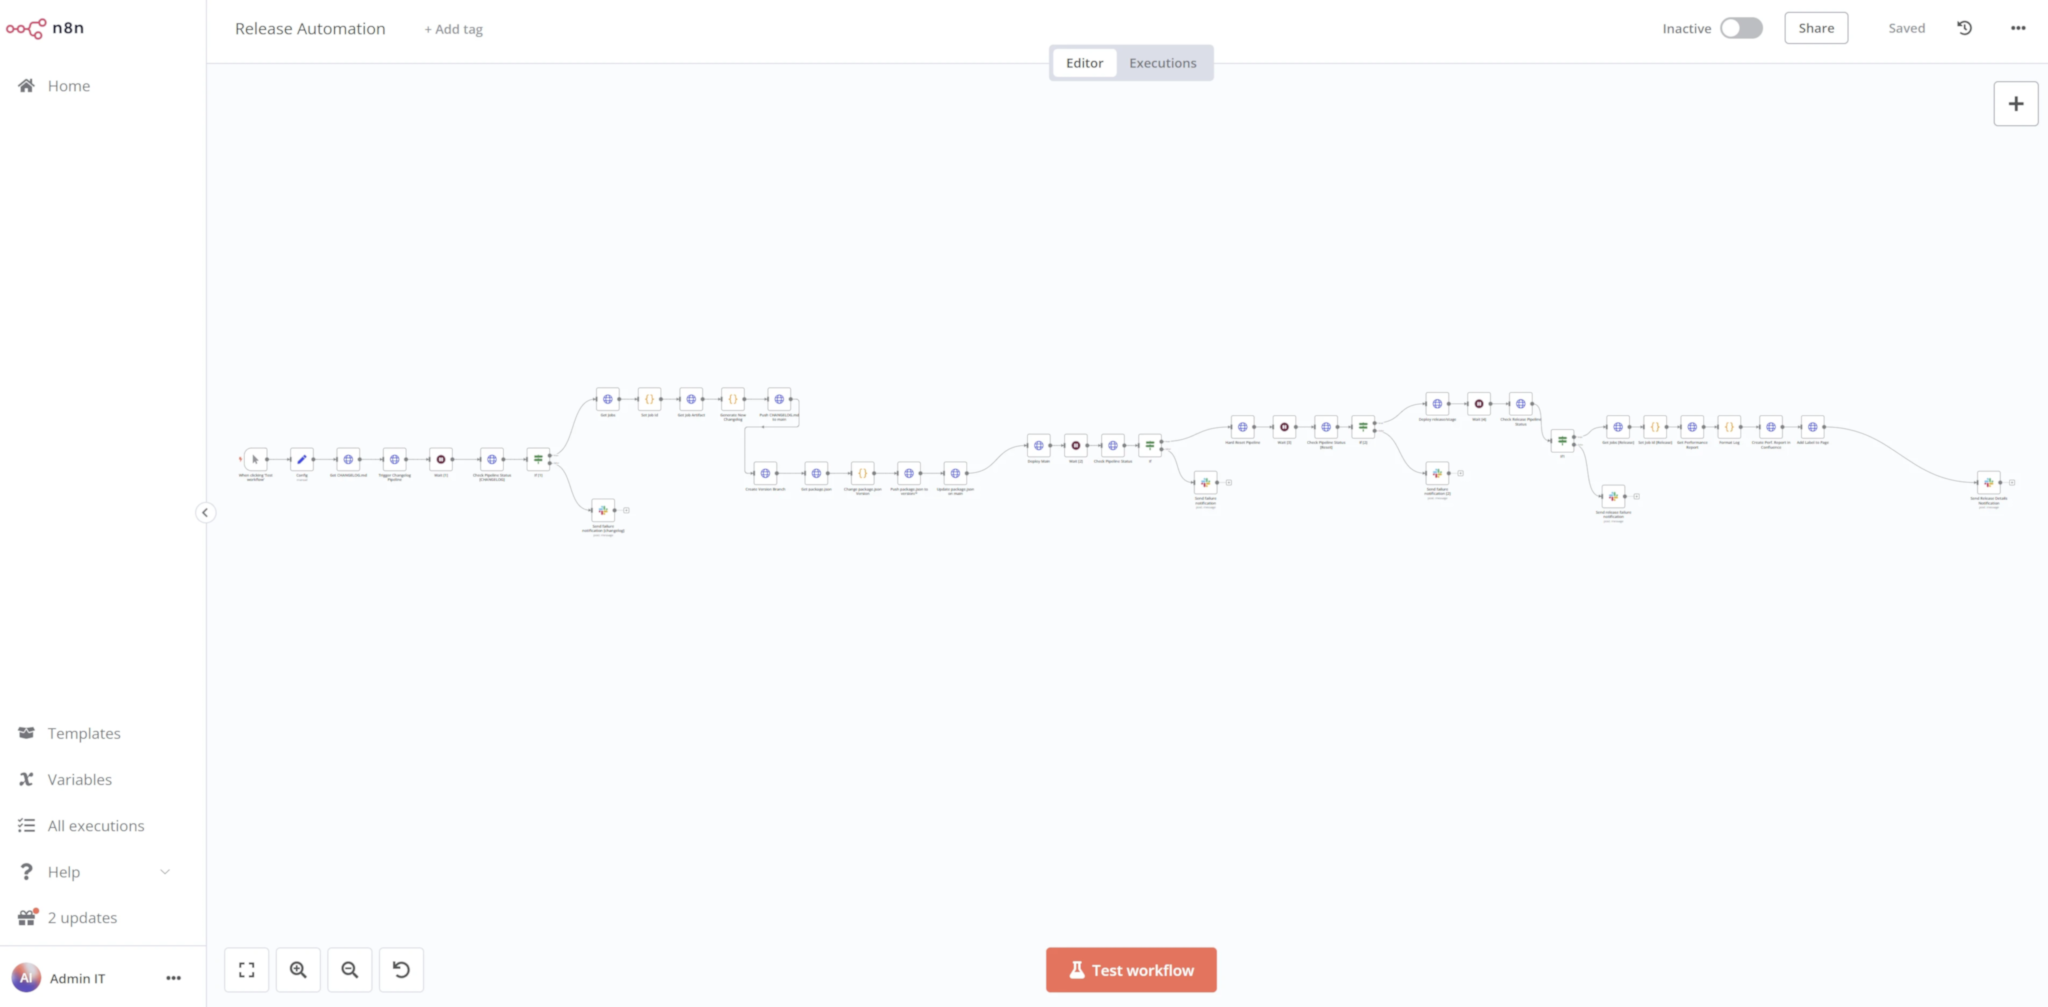
The release automation workflow is designed to manage complex deployment processes efficiently. It integrates steps such as changelog generation, performance testing, and environment-specific deployments, all while keeping the team updated via Slack notifications. Below is a visual representation of the workflow:
 Release n8n schema